Hand tools may seem simple, but improper use can lead to injuries like cuts, eye damage, or worse. Whether you're a DIY pro or just starting, safety comes down to a few key habits:
- Use the Right Tool: Match each tool to its specific job to avoid slips and damage.
- Inspect Tools Before Use: Check for cracks, dull edges, or loose parts to prevent accidents.
- Wear Protective Gear: Safety glasses, gloves, and closed-toe shoes are non-negotiable.
- Organize Your Workspace: A clean, well-lit area reduces risks and keeps you focused.
- Maintain Your Tools: Regular cleaning, sharpening, and proper storage extend their life and keep them safe to use.
Hand Tool Inspection - Tips for Safety
Selecting the Right Tool for Each Task
Reaching for the nearest tool might seem like a quick fix, but it’s also one of the easiest ways to hurt yourself. Every hand tool is designed with a specific purpose in mind. Using the wrong tool for the job not only makes the task harder but also increases the likelihood of losing control and getting injured.
Tool Purpose and Specifications
Each tool has a job it’s meant to do, and trying to force it into a role it wasn’t designed for can backfire - literally. For example, using a wrench as a hammer or a screwdriver as a chisel might feel like a shortcut, but it could lead to broken tools, slips, or even serious injuries.
Before you dive into a project, take a moment to match your tools to the task. If you’re cutting wood, select a saw with the right blade and tooth design for the material. For fastening jobs, stick to the basics: hammers for nails, screwdrivers for screws, and wrenches for bolts. Using the right tool not only gets the job done faster but also keeps you safer.
Sharp tools are another key to safety. A sharp blade cuts cleanly and requires less force, reducing the chance of a slip. On the other hand, dull blades demand more effort, increasing the risk of the tool slipping or breaking. If your cutting tool feels like it’s struggling, it’s time for a sharpening or replacement.
For jobs requiring extra leverage, choose long-handled tools instead of pushing a smaller one beyond its limits. And if you’re working on electrical projects, make sure to use insulated tools to protect yourself from shocks.
Once you’ve picked the right tool for the job, take a closer look at its design to ensure it’s both safe and comfortable to use.
Ergonomics and Safety Features
The way a tool feels in your hand plays a huge role in your safety. Ergonomics isn’t just about comfort - it’s about maintaining control and avoiding strain.
Start with the grip. The handle should fit your hand comfortably without forcing you to grip too tightly. Tools that are too big or too small can put your hand in awkward positions, leading to fatigue or even injury. Ideally, your wrist should stay straight while you work - bent wrists add unnecessary stress to your joints and tendons.
Weight is another factor. Heavier tools require more effort to control, and during long projects, that extra weight can wear you out. Look for tools with good weight balance; a front-heavy tool, for instance, can quickly tire out your arm and shoulder. When using heavier tools, keep your elbows low and slightly bent to maintain proper posture and reduce strain.
High-quality tools often come with built-in safety features. Non-slip grips can help you maintain control even when your hands are sweaty, and blade guards are a must for cutting tools. For tools designed for two-handed use, like spoke shaves or drawknives, make sure the handles are long enough to keep your hands away from sharp edges.
If a tool feels uncomfortable or strains your grip, it’s worth replacing. Over time, using poorly designed tools can lead to joint issues or muscle fatigue. Opt for a lighter, better-fitting alternative or take regular breaks to avoid long-term damage.
Choosing tools that are both task-specific and easy to handle is essential for staying safe. While high-quality tools might cost more upfront, they’re built with safety in mind - offering better materials, thoughtful design, and features that help reduce the risk of injury. It’s an investment that pays off in both performance and peace of mind.
Inspecting Tools Before Use
Always check your tools for wear or damage before using them, even if they seem fine at a glance. A minor issue can quickly turn into a safety hazard. Even tools that are usually well-maintained can become dangerous if they're damaged.
Make it a routine to inspect every tool before use, whether it’s something you just put away yesterday or a tool that’s been sitting idle for months. This is especially important in shared workspaces where others might have handled your tools. Pay close attention to each part of the tool for any signs of wear or damage.
Checking for Damage
Start with the handle. Run your hand over it to feel for cracks, splits, or rough spots. Wooden handles can splinter, while plastic or rubber grips may crack or harden over time. A compromised handle can break unexpectedly, causing you to lose control of the tool.
Inspect other components like heads, cutting edges, and moving parts for signs of wear, cracks, or chips. For example, a chipped hammer head can send fragments flying on impact, and wrenches with misaligned or sprung jaws can slip off fasteners, leading to injuries.
Pay extra attention to cutting tools. Look for chips, bends, or dull edges on chisels, saws, and blades. Dull blades are more dangerous than sharp ones because they require more force to cut, increasing the risk of slipping. If your saw blade struggles to cut or your chisel doesn't glide smoothly through wood, it’s time to sharpen them.
Check the mechanisms on tools with moving parts. For example, test clamps to ensure they grip firmly, and adjust wrenches to confirm smooth operation. Make sure any locking mechanisms engage securely. Rust or corrosion can cause parts to stick or fail, so address these issues promptly.
For screwdrivers, inspect the tip to ensure it isn’t bent or worn flat. A damaged tip can slip out of screw heads, potentially causing injury or loss of control. Any tool with a specific contact point - like pliers or cutters - should be checked to confirm it grips securely. If a tool wobbles, feels loose, or makes unusual noises during use, stop using it immediately.
When to Repair or Replace Tools
Not every damaged tool needs to be thrown out, but it’s crucial to know when repair is an option and when replacement is the safer choice. Some issues can be fixed, while others make a tool permanently unsafe.
Replace tools right away if they have cracked or split handles. A compromised handle can fail without warning, and there’s no reliable way to fix structural damage. Similarly, tools with missing or broken components - like a hammer with a loose head or a wrench with a broken jaw - should be discarded. Severely bent or damaged cutting blades should also be replaced rather than repaired.
For minor issues, repairs can often extend a tool’s life. Sharpen dull edges with appropriate tools or services. Light rust can usually be removed with rust removers or gentle sanding. Loose screws or fasteners on tool heads can be tightened to restore functionality.
When in doubt about a tool’s safety, it’s better to be cautious. If you’re unsure whether a repair will hold or if the damage is too severe, don’t take the risk. No tool, no matter how expensive or sentimental, is worth an injury.
Once you identify a damaged tool, remove it from your workspace immediately. Clearly mark it as unsafe using tape, a label, or by placing it in a designated area for damaged tools. If you share your workspace, inform others about the issue to prevent accidental use.
Document the damage and your decision to repair or replace the tool. Keeping a simple record can prevent future confusion and ensure accountability. If you’re using borrowed tools, notify the owner about any damage so they can decide on the next steps.
For tools you use frequently, maintaining a basic log of inspections, repairs, and issues can be incredibly helpful. This practice allows you to spot recurring problems - like a tool that keeps breaking - and plan for replacements before something fails critically. After inspecting and addressing any issues, always prioritize safe operation practices.
Safe Hand Tool Operation
Once you've inspected your tools, the next step is knowing how to use them correctly. While hand tools might seem simple, improper use can lead to injuries just as easily as power tools. In fact, when mishandled, they can cause accidents that are entirely avoidable[3].
The foundation of safe tool use lies in understanding that every tool has its own techniques and requires proper body mechanics. Misusing a tool doesn’t just increase the chance of injury - it can also make your task more difficult and less precise. If you find yourself using too much force, struggling to control the tool, or working in an awkward position, pause and reassess. After ensuring your tools are safe, correct operation becomes your best defense.
Proper Handling Techniques
Start with a secure stance: keep your feet shoulder-width apart for balance, and maintain a firm but relaxed grip on the tool. Keep your wrist straight to reduce strain, and when working with heavier tools, keep your elbows slightly bent and low to minimize fatigue and improve control.
For heavier tasks, shift your weight as needed to stay balanced, but avoid overreaching, stretching, or working above shoulder height. Always secure your workpiece with a vise or clamp to prevent it from slipping or moving unexpectedly. This not only keeps your materials steady but also frees both hands to control the tool safely[2][6]. While C-clamps are a quick fix for temporary holding, they’re not a substitute for permanent fastening solutions[7].
Each type of tool requires a specific approach:
- Striking tools (like hammers): Use your arm and body weight to generate force, not just your wrist. Keep a firm grip and aim for controlled, accurate swings[1].
- Cutting tools (like chisels and saws): Maintain the correct cutting angle and use consistent, smooth motions. Always cut at a 90-degree angle to avoid damaging the blade, and ensure blades are directed away from your body and others[6].
- Fastening tools (like screwdrivers and wrenches): Apply steady, controlled pressure. Make sure wrenches grip bolts or nuts securely to prevent slipping or damage[8].
Sharp tools are safer than dull ones. A dull blade requires more force, increasing the risk of slipping and injury. If your saw struggles to cut or your chisel doesn’t glide smoothly, stop and sharpen it before continuing[4].
For precision work, use both hands to maintain control. Keep a clear view of your work and ensure proper alignment. For example, when using a circular saw, adjust the blade guard with one hand rather than removing it entirely[3].
Pay attention to your body. Strain in your hands, wrists, or arms could signal improper technique or the wrong tool for the job. If you notice difficulty controlling the tool, unexpected slipping, or instability, take a moment to reassess your setup before moving forward.
By following these techniques, you’ll naturally avoid many common mistakes and improve both safety and efficiency.
Common Mistakes to Avoid
One of the most important rules of hand tool safety is to use each tool only for its intended purpose. For instance, don’t use a wrench as a hammer, a screwdriver as a chisel, or pliers as a wrench. Doing so can damage the tool and significantly increase the risk of injury[7].
Avoid using extensions that compromise your control over the tool[7]. Similarly, never bang one tool against another to force a fit - this is both unsafe and ineffective. If a tool isn’t working as expected, stop and evaluate rather than forcing it.
Excessive force is another red flag. If you’re straining, it’s likely due to a dull tool or improper technique. Take a moment to adjust or sharpen as needed.
Pointed tools should always be carried in a toolbox or cart to avoid accidents[2]. When working at heights, secure your tools to prevent them from falling and injuring someone below. Never toss tools to another person; always hand them over by the handle[7].
Stay focused when using hand tools. Avoid working when you’re tired, distracted, or in a rush. A clutter-free workspace also reduces trip hazards and helps you maintain stable footing. Additionally, keep tools away from extreme heat, as it can weaken their material and make them unsafe to use[6].
Finally, resist the temptation to cut corners or skip safety steps, especially when you're pressed for time. Many injuries occur when people prioritize speed over proper technique. No deadline is worth compromising your safety.
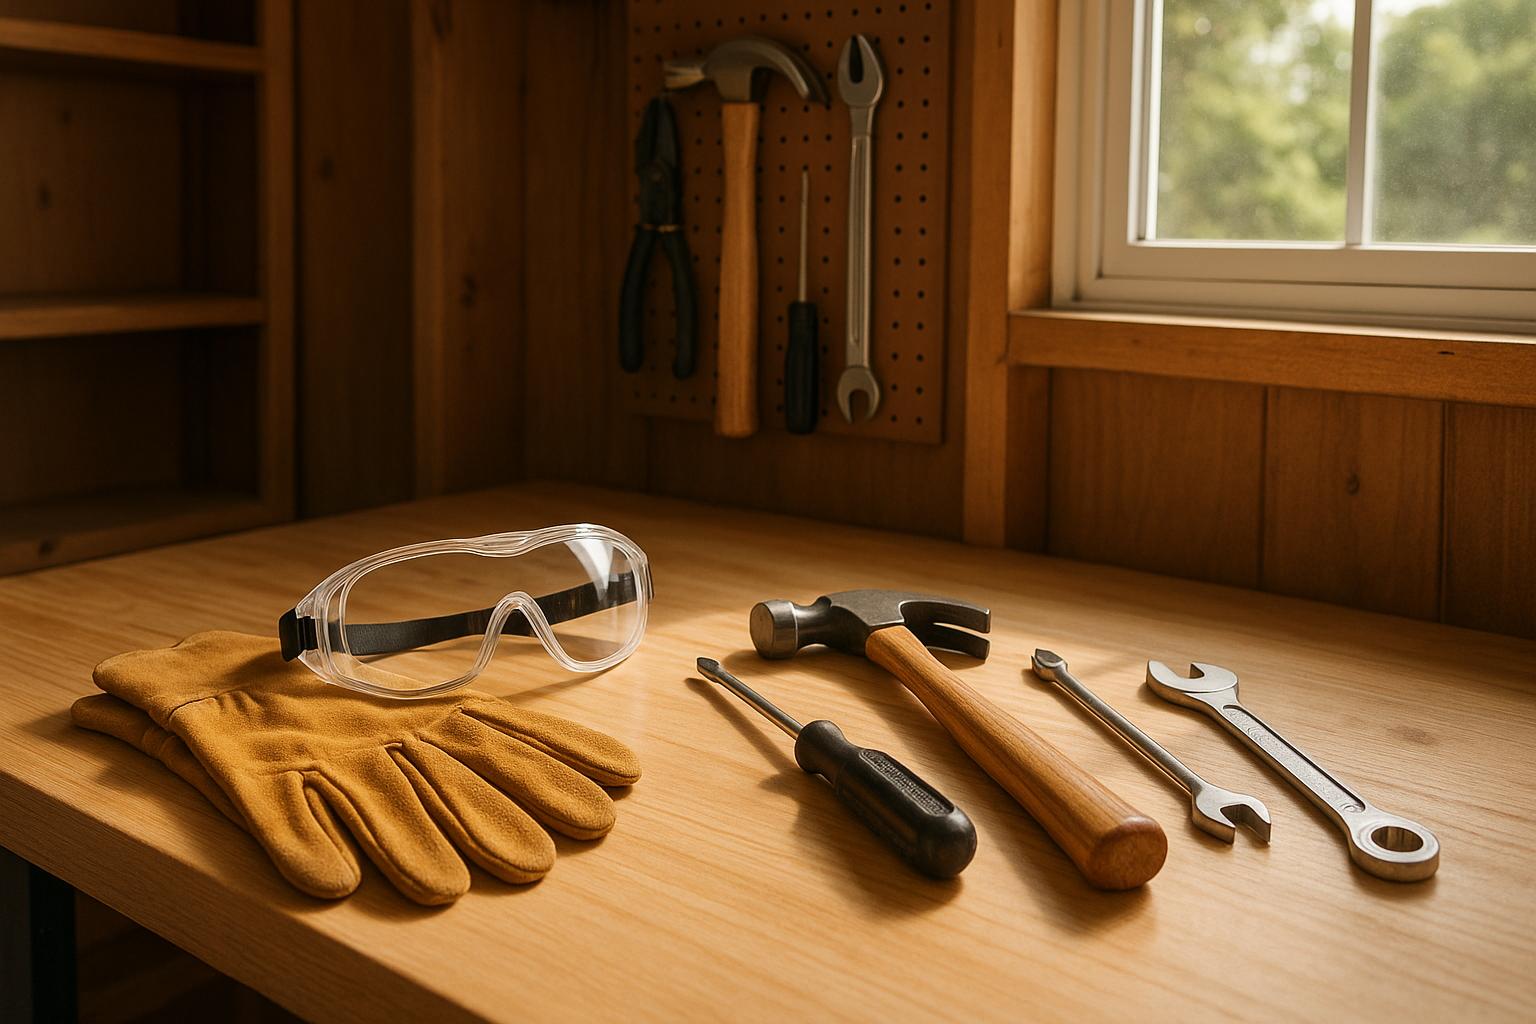
Personal Protective Equipment (PPE)
Even with the best techniques, accidents can happen. That’s where Personal Protective Equipment (PPE) steps in as your first line of defense. Whether it's a chisel slipping, a hammer missing its mark, or sawdust flying toward your eyes, PPE is crucial for preventing both immediate injuries and long-term harm. Below, we’ll cover the essential PPE gear you need for any home project and how to use it effectively.
Safety Glasses, Gloves, and Footwear
Protecting your eyes, hands, and feet is non-negotiable when working with tools. Start with ANSI Z87.1-rated safety glasses to shield your eyes from debris and flying particles. For extended use, opt for anti-fog, well-fitted models that stay comfortable over time.
Your hands are often closest to the action, making gloves essential. Leather gloves are great for general tasks, while chemical-resistant gloves are better for handling hazardous substances. Choose gloves that fit snugly - not too tight to restrict movement and not too loose to risk slipping. Always inspect them for tears or wear before starting your work.
For your feet, closed-toe, slip-resistant shoes or steel-toed boots are a must. These protect against falling objects and reduce the chance of slipping. Leave the sandals and flip-flops for lounging - they have no place in a workshop. Poor footwear can lead to serious injuries, so prioritize sturdy, well-gripped options.
Some tasks may require extra gear, like respirators for fumes or ear protection for loud machinery. Always inspect your PPE before use - check safety glasses for cracks, gloves for damage, and respirator filters for integrity. Store your gear in a clean, dry spot away from sunlight, chemicals, or extreme heat, and replace damaged items immediately. Keeping spares on hand ensures you’re never caught without proper protection.
Clothing and Work Environment
What you wear and where you work are just as important as the gear you use. Choose fitted clothing to avoid accidents with moving parts, and make sure long hair and jewelry are secured. Loose items can easily get caught in tools, creating unnecessary risks.
A safe and organized workspace is the backbone of any project. A clean, dry area reduces slips and falls, while good lighting helps you spot hazards before they become problems. Keeping tools and materials neatly arranged prevents accidental cuts or bumps. A clutter-free environment not only improves safety but also enhances the effectiveness of your PPE.
PPE and proper tool-handling techniques go hand-in-hand. While PPE provides a safety net, smart practices - like using clamps to secure workpieces - can help prevent accidents in the first place. The best approach combines protective gear, proper tool use, and a well-organized workspace.
Comfort is also key. If standard PPE feels too restrictive, look into specialized alternatives rather than skipping protection altogether. For longer projects, take breaks to inspect your gear, ensuring it stays in good condition and properly adjusted throughout your work. Balancing protection and comfort will help you stay safe and productive from start to finish.
Tool Maintenance and Storage
Taking care of your tools is crucial for ensuring they work safely and reliably. Once you've used a tool, the next step is maintaining and storing it properly. A well-cared-for tool not only lasts longer but also performs as expected, while a neglected one might fail when you need it most.
Post-Use Maintenance
After every use, clean your tools to remove dirt and debris that could hide damage or affect how they function [2]. Make it a routine to wipe them down before putting them away.
For cutting tools like chisels, saws, and knives, sharpness is more than just about getting the job done - it’s a safety issue. A dull blade requires more force to cut, increasing the risk of slipping [2][4]. Regular sharpening or grinding keeps these tools safe and effective. If you find yourself struggling to make a cut, it’s time to sharpen that blade.
Metal tools are prone to rust and corrosion, especially if exposed to moisture. After using them, dry them thoroughly and apply a light layer of oil to keep rust at bay [2].
Wooden handles need special care. Look for cracks, splinters, or signs that the handle is loosening from the tool head [2]. A loose hammer handle, for example, can cause the head to fly off during use, posing a serious hazard. If you notice damage, replace the wooden handle - consider switching to a steel handle for added durability [2].
For wrenches and pliers, check the jaws to ensure they align properly and aren’t damaged. Misaligned jaws can slip during use, leading to injuries or damage to your workpiece [4]. If the jaws are worn or won’t close correctly, it’s time to replace the tool.
Even tools that sit unused for long periods need attention. Before storing them, clean and inspect each tool for any signs of wear or damage [2]. When you’re ready to use them again, check for rust, corrosion, or loose parts that may have developed during storage [2][4]. Never assume a tool is safe just because it hasn’t been used.
Dispose of or repair any damaged tools immediately [2]. Keeping your tools in top condition not only extends their lifespan but also ensures your projects stay safe and efficient.
Safe Storage Practices
Once your tools are maintained, proper storage is essential to keep them in good condition and prevent accidents. A designated storage spot - whether it’s a toolbox, cabinet, or storage shed - helps keep tools secure and out of reach of children or others who might misuse them [2]. Sharp tools like chisels, knives, and saws should always have blade guards or protective sheaths to avoid accidental cuts [2][9].
Avoid carrying pointed tools in your pockets. Use a toolbox or cart to transport them instead [2]. This simple step prevents injuries like puncture wounds and keeps tools from falling out and causing harm. Similarly, don’t leave tools lying around your workspace or in walkways where they could trip someone or fall and cause injury [2][4].
Environmental factors also matter. Store tools in a dry location to prevent rust [2]. Keep them away from extreme heat, which can weaken metal and make it more likely to break during use [6]. A climate-controlled garage, basement, or indoor cabinet is ideal, as outdoor sheds often experience fluctuating temperatures and humidity [2].
Organization helps balance accessibility and safety. Assign a specific spot for each tool using pegboards, tool chests, or labeled drawers [2]. This setup makes it easy to spot missing or damaged tools, saves time during projects, and keeps tools from being left in unsafe places. Store frequently used tools at eye level or within arm’s reach, while less commonly used items can go in less accessible areas.
For larger tool collections, digital tools like Toolstash can simplify management. Features such as categorization and location tracking help you know exactly where each tool is stored and when it needs maintenance. This digital system complements your physical setup, ensuring nothing is overlooked.
Make sure your storage area is well-lit so you can access tools safely without fumbling in the dark, which could lead to cuts or other injuries [5]. Keep the area clean, organized, and clearly labeled to minimize hazards and make tools easy to locate [2][5].
If you have children in your household, security is critical. Store all tools in a locked space that’s completely inaccessible to kids. Once children are old enough - around 12 years or older - they can begin using manual tools, but only under close supervision and with proper instruction [6]. Even then, independent use should wait until they’ve demonstrated they can handle tools safely.
Setting Up a Safe Workspace
Creating a safe and efficient workspace is essential before starting any task. A well-prepared area minimizes risks and ensures everything you need is within easy reach. Let’s break down how to set up your workspace for safety and productivity.
Organizing Tools and Materials
Clutter isn’t just an inconvenience - it’s a safety hazard. Start by clearing out anything unnecessary, like old materials, empty boxes, or random items that have piled up. A clean, organized space reduces the chance of tripping or accidents and gives you room to work comfortably.
Once the area is clear, make it a habit to return tools to their proper storage right after use. This keeps your workspace tidy and prevents injuries caused by misplaced tools. Avoid leaving tools on elevated surfaces where they could fall. If you need to move tools to a higher level, use a bucket or bag with a rope instead of carrying them while climbing a ladder - it’s safer and keeps your balance steady.
When working on a project, secure your materials with clamps or a vise. This frees up both hands, giving you better control over your tools. Set up your workspace with a stable, level surface and ensure you’re working in a comfortable position to avoid unnecessary strain. For heavier tools, keep your elbows slightly bent and close to your body for better control and reduced fatigue.
Make sure you have enough space around you to operate tools safely. Whether you’re swinging a hammer or using a saw, clear surroundings prevent accidental bumps or mishaps. Organizing tools systematically - like using labeled drawers, pegboards, or even a digital tracking system like Toolstash - makes them easy to find and keeps your work moving smoothly.
It’s also smart to have backup tools stored safely away from your immediate work zone. And if you’re working in an area where others might pass through, mark it clearly as off-limits. For extra safety, use protective screens or barriers to shield bystanders from flying debris or materials.
Finally, don’t overlook the basics: good lighting and cleanliness. These go a long way in keeping your workspace safe.
Lighting and Cleanliness
Good visibility is non-negotiable when working with tools. Proper lighting - whether it’s natural light, overhead fixtures, or task-specific lamps - helps you spot hazards, inspect tools for damage, and stay focused on your work. Arrange lights to minimize shadows and avoid glare that could strain your eyes or obscure your view.
A dry, clean workspace is just as important. Wet or damp surfaces can lead to slips and increase the risk of electrical shock if you’re working with power tools. Use absorbent materials or ensure proper ventilation to keep moisture at bay. Dust can also be a problem, reducing grip and creating hazards, so wipe down surfaces and clear debris regularly.
Other environmental factors matter too. Make sure your workspace is well-ventilated, especially if you’re working with materials that produce dust or fumes. Keep a first-aid kit nearby for quick access in case of minor injuries. And don’t forget to use a sturdy, appropriately-heighted workbench to maintain good posture and avoid unnecessary strain on your back and joints.
Conclusion
Staying safe while using hand tools might seem straightforward, but it requires consistent attention and practice. Whether you're hanging a picture frame or tackling a more ambitious project like building a deck, taking a careful and deliberate approach can make all the difference. The line between a successful DIY project and an injury often comes down to a few simple habits.
Start with preparation. Choosing the right tool for the job and using it correctly reduces the chances of mishaps. Before you begin, inspect your tools, wear appropriate personal protective equipment (PPE), and ensure your workspace is safe and organized. Respecting how a tool is designed not only keeps you safe but also improves the quality of your work. Make it a point to regularly check and maintain your tools - turning safety into second nature.
PPE, such as safety glasses, closed-toe shoes, and the right gloves for the task, adds an essential layer of protection. Since every project carries its own risks, take a moment to assess what level of protection is necessary before diving in.
Your workspace setup is equally important. A clean, well-lit, and organized environment reduces the likelihood of accidents and helps you stay focused on the task at hand. By adopting these practices, you can ensure your projects are both safe and efficient.
Prioritizing hand tool safety is an investment in your well-being that pays off with every project. Professional tradespeople live by these principles, and there's no reason DIY enthusiasts can't do the same. Platforms like Toolstash can help you stay organized and keep your tools in top condition, further supporting your safety efforts.
Ultimately, safety comes down to your choices and the respect you show for the tools in your hands. When you're prepared and mindful, you'll approach each project with confidence, knowing you've taken the steps to prevent avoidable accidents. Safety isn't just a precaution - it's the foundation of a satisfying and successful DIY experience.
FAQs
How can I tell if a hand tool needs repair or replacement to stay safe during DIY projects?
To stay safe while working with hand tools, keep an eye out for these warning signs that a tool might need fixing or replacing:
- Visible damage: Check for cracks, chips, or heavy wear on handles, blades, or other components.
- Loose or unstable parts: If handles, screws, or fasteners feel shaky or insecure, the tool's safety may be compromised.
- Rust or corrosion: Excessive rust can weaken metal parts and make the tool less effective.
- Dull edges: Tools like saws or chisels with blunt edges can be risky, as they demand more force to operate.
Damaged tools aren't just less effective - they're more likely to cause accidents. Regularly inspecting and maintaining your tools ensures they're ready and safe for all your DIY tasks.
What are some tips for setting up an ergonomic workspace to reduce strain when using hand tools?
Creating a workspace that supports your body’s needs is essential for staying comfortable and avoiding strain during DIY projects. Start by adjusting your workbench or surface to a height that lets you work naturally - waist height works well for most people. This helps you avoid bending or reaching too much, which can lead to unnecessary strain. If you’ll be sitting for long periods, choose a sturdy chair or stool with good back support to keep your posture in check.
Keep your tools organized and within easy reach to prevent awkward stretching or twisting. Clutter-free spaces not only look better but also make tasks smoother. For added comfort, opt for tools with padded grips or ergonomic handles - they can make a big difference in reducing hand fatigue. Finally, don’t forget to take short breaks to stretch and realign your posture. These small adjustments can go a long way in keeping you comfortable during longer projects.
What personal protective equipment (PPE) should I use for different hand tool tasks?
Using the right personal protective equipment (PPE) is key to staying safe during any DIY project. The specific gear you'll need depends on the tools and tasks you're tackling, but here are some essentials to keep in mind:
- Safety glasses or goggles: Protect your eyes from flying debris when cutting, drilling, or hammering. They're a must-have for any project involving power tools or sharp objects.
- Gloves: Sturdy work gloves can shield your hands from cuts, splinters, and abrasions. However, skip the gloves when working with tools that have moving parts to avoid accidents.
- Hearing protection: Loud tools like hammers, chisels, or power saws can damage your hearing over time. Earplugs or earmuffs can help reduce the noise and keep your ears safe.
- Dust mask or respirator: If your project involves sanding, sawing, or working with materials that generate dust or fumes, a mask can protect your lungs from harmful particles.
- Steel-toe boots: These are great for preventing foot injuries caused by dropped tools or heavy materials.
Before diving into your project, take a moment to assess the risks and ensure you're equipped with the right PPE. A little preparation goes a long way in keeping you safe and confident while you work!