Power tools have transformed wood carving, making it faster, less physically demanding, and more precise. Whether you're a beginner or experienced, the right tools can help you achieve detailed designs with ease. Here's a quick breakdown:
- What is Power Carving? It's the process of shaping wood using powered tools like rotary tools, angle grinders, and die grinders instead of hand tools. This saves time and effort.
- Why Use Power Tools? They reduce physical strain, speed up carving, and allow for detailed work that would take much longer with hand tools.
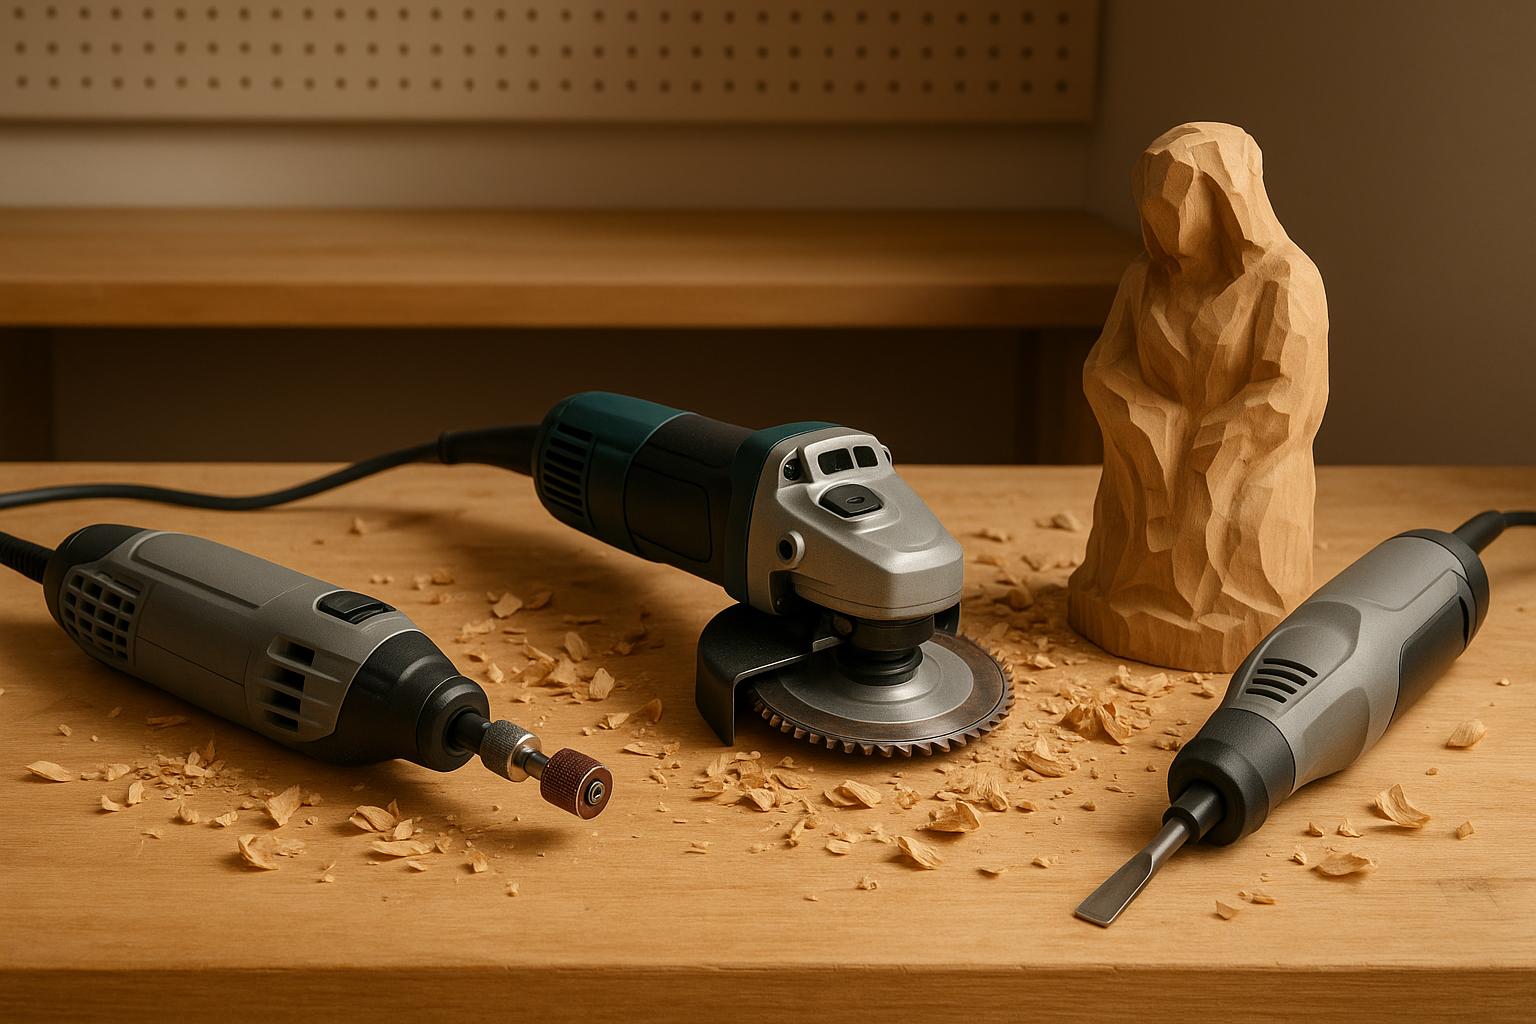
- Types of Tools: Rotary tools (e.g., Dremel) for fine details, angle grinders for removing large material, and power chisels for refining shapes.
- Key Considerations: Focus on motor speed (20,000+ RPM), tool durability, and quality attachments like tungsten carbide burrs.
- Safety Tips: Use protective gear (respiratory, eye, and ear protection), secure your workpiece, and maintain your tools regularly.
Power Carving Basics - Intro to Power Carving - TreelineUSA.com
Types of Power Carving Tools
When it comes to power carving, knowing your tools can make all the difference. Each one has a specific purpose, from removing large chunks of material to crafting intricate details. Let’s break down how rotary tools, angle grinders, and power chisels work together to streamline the carving process.
Rotary Tools
Rotary tools are perfect for adding those intricate, final touches. They operate at adjustable speeds, making them versatile for different materials and precision levels. Tools like the Dremel, often described as a micro die grinder, are ideal for fine detail work. Think of adding facial features, decorative patterns, or textures - tasks that would be tedious or nearly impossible with hand tools [1].
To keep your rotary tool in good shape, a flex shaft attachment is a must. This accessory shields the motor from wood dust, which can otherwise shorten the tool's lifespan [3]. A beginner-friendly option is the Dremel 4000 with a flex shaft, but keep in mind its limitations - it’s not built for extended use beyond 30 minutes at a time. For heavier-duty projects, you might want to upgrade to something like the Foredom K.5240 Woodcarving Kit [3].
Rotary tools shine in the third stage of carving, where the focus is on adding super fine details after the basic shape has been roughed out and refined. Pair them with micro burrs to achieve a hand-carved look without the physical strain. For the earlier stages of carving, however, you’ll want to look at more robust tools like angle grinders.
Angle Grinders
If you need to remove a lot of material fast, angle grinders are your go-to. With specialized attachments like the Arbortech blade, they’re unmatched for roughing out basic shapes in the early stages of carving [1].
The Arbortech attachment is a rotary woodcarving blade with three tungsten carbide blades mounted at 90-degree angles. This design allows it to carve grooves akin to traditional gouges but at a much faster pace. Despite its aggressive cutting power, it offers surprising control, allowing you to remove large amounts of material while still achieving relatively fine cuts [1].
Angle grinders are best suited for projects that require heavy-duty material removal, whether you’re working on large sculptures, furniture pieces, or any design that starts with a substantial block of wood. Safety is critical when using these tools - always secure your workpiece, maintain a firm grip, and wear proper safety gear, including respiratory, eye, and ear protection [2].
Typically, the carving process starts with an angle grinder for rapid shaping. Once the rough form is established, you can transition to tools like power chisels for more detailed work.
Power Chisels
Power chisels, also called reciprocating carvers, offer a balance between aggressive material removal and controlled detail work. Unlike rotary tools that spin continuously, power chisels remain stationary until pressure is applied, giving you greater control over your cuts [4].
These tools are particularly useful in the second stage of carving, where the focus shifts from rough shaping to refining the design. Die grinders, which fall under this category, are especially versatile. By swapping out different burrs, you can handle a variety of tasks, from smoothing curved surfaces to carving sharp V-grooves. What matters most isn’t the brand of the tool but the quality of the cutting burrs you pair with it [1]. For example, a budget-friendly Bosch router body can be repurposed for carving when combined with high-quality tungsten carbide cutters [1].
Power chisels and die grinders excel at medium-sized details, smoothing surfaces, and refining shapes. They bridge the gap between the heavy lifting done by angle grinders and the delicate finishing work handled by rotary tools, bringing your artistic vision to life with precision and control.
How to Select the Right Tools and Accessories
Picking the right power carving tools is all about matching your tools to your project needs for the best results.
What to Consider When Choosing Tools
Motor speed is key. Look for tools with a minimum speed of 20,000 RPM and adjustable settings to handle various wood types. For example, softer woods require lower speeds, while harder woods benefit from higher RPMs to avoid burning and ensure smooth cuts. Die grinders, for instance, can reach up to 22,000 RPM[1].
Weight and ergonomics make a big difference. If you’re carving for hours, you’ll want a tool that feels balanced and comfortable to hold. Think about how you’ll be working - whether you’re holding the tool overhead or using it horizontally on a bench. A well-balanced tool can reduce fatigue and improve control.
Durability is a smart investment. Budget tools often wear out quickly with continuous use. For more intensive projects, consider tools built for durability. For example, while a Dremel rotary tool works well for short sessions (up to 30 minutes), a Foredom rotary tool with a flex shaft is a better choice for longer, more demanding tasks[3].
Focus on quality attachments over the tool brand. The cutting burrs you use matter more than the tool itself. For instance, pairing a budget-friendly Bosch router body with high-quality tungsten carbide cutters can still deliver professional results[1]. If you’re on a budget, prioritize spending on top-notch accessories.
Match your tool to your project size. Smaller projects like figurines or detailed texture work may only need a Dremel tool for precision[1]. On the other hand, larger projects, such as sculptures or furniture, may require more aggressive tools like an Arbortech attachment on an angle grinder for quick material removal and fine cuts[1].
Think about clamping options. Whether you prefer to clamp the workpiece and move the tool or secure the tool in a vise and move the object, your setup affects performance. For example, small finger sanders and die grinders often work best when clamped in a vise[1]. Consider your workspace and carving style to decide what works best for you.
Once you’ve chosen tools with the right speed, ergonomics, and durability, pairing them with high-quality accessories will elevate your carving experience.
Accessories for Wood Carving
Once you have a solid tool, the right accessories can take your carving to the next level.
Cutting burrs are your most important investment. High-quality tungsten carbide burrs are essential, as they come in various shapes and grades tailored to specific tasks. For example, cone-shaped burrs are great for detailed work, while more aggressive burrs help with rapid material removal. Coarser grades work well for rough shaping, while finer grades leave smoother surfaces that need less sanding.
Different burr shapes handle different challenges. Rounded cone burrs are ideal for intricate details, cylindrical burrs create flat surfaces and sharp edges, and ball-shaped burrs are perfect for carving concave areas and smooth transitions. Building a collection of burrs in various shapes and grades gives you the flexibility to handle any project.
Flex shaft attachments improve precision. A flex shaft lets you maneuver more easily, especially in tight spaces, without straining your wrist. For beginners, the Dremel 4000 with a flex shaft is a good starting point, but for more advanced work, upgrading to a Foredom K.5240 Woodcarving Kit might be worth considering[3].
Sanding attachments help refine your work. After carving, power sanders with attachments like drum sanders or flat pads can smooth surfaces. Start with coarse grits (80–120) to remove tool marks, then move to finer grits (150, 220, and even 320) for a polished finish ready for staining or sealing[1].
Specialized attachments expand what you can do. Tools like metal flywheel cutters can turn an angle grinder into a powerful roughing tool. Other options include power planers for shaping wide concave surfaces and reciprocating power chisel attachments that offer controlled carving without constant motion[4].
Safety gear is non-negotiable. Always use proper safety equipment, including respiratory protection, safety glasses or a face shield, and ear protection. These precautions protect you from flying debris, dust, and the loud noise of power tools[2].
Clamping systems improve safety and precision. Secure clamps let you focus on guiding the tool without worrying about the workpiece moving. Options range from basic C-clamps to specialized carving vises that rotate and tilt, keeping your project stable without causing damage[2].
As you grow from a beginner to a more experienced carver, you’ll likely spend more on accessories than on upgrading your base tools. Start with a reliable mid-range tool and a basic set of tungsten carbide burrs. Over time, add specialized attachments as your projects become more complex. This approach keeps costs manageable while allowing your setup to evolve with your skills.
Materials and Applications
The way materials react to power carving plays a big role in shaping your technique and keeping your tools and workpiece in good condition.
Wood Types for Power Carving
When it comes to wood, softwoods and hardwoods behave very differently under power tools. Softwoods like pine, cedar, and basswood are easier to work with because of their softer textures and consistent grain. They allow for faster carving and are particularly beginner-friendly. Basswood, in particular, is a favorite for newcomers thanks to its fine, even grain and soft texture, making it easier to carve with precision and without needing intense tool settings.
On the other hand, hardwoods like oak, maple, walnut, and cherry demand more effort. They require higher RPMs and sharper burrs to achieve clean cuts. Grain orientation also plays a big role in the quality of your cuts, so adjusting your tool settings to match the material is essential.
Other Materials for Carving
While wood is the most common choice for power carving, materials like stone and bone open up new possibilities. Soapstone, alabaster, and bone require a different approach - diamond-coated burrs and water cooling are essential to handle the abrasive dust these materials produce.
No matter the material, the general process for power carving stays consistent. Start with tools designed for heavy removal, like the Arbortech, and then move to finer detailing tools such as die grinders or Dremel tools. However, the specifics - like speed settings, burr types, and whether you need cooling or lubrication - will vary depending on the material. A good rule of thumb is to practice on scrap pieces first. This helps you fine-tune your technique and avoid costly mistakes on your final project.
Safety Tips and Maintenance
When working with power carving tools, prioritizing safety and maintaining your equipment are non-negotiable. These tools operate at high speeds and generate a lot of debris, so taking the right precautions and caring for your tools properly will not only keep you safe but also help your tools last longer.
Safety Practices for Power Carving
Using the right protective gear is a must. Respiratory protection shields your lungs from fine wood dust, which can cause long-term damage if inhaled. Eye protection defends against flying wood chips and debris that could cause serious injuries. And let’s not forget ear protection - power carving tools like angle grinders and die grinders can be incredibly loud, and prolonged exposure to high noise levels can harm your hearing.
Beyond personal protective equipment (PPE), how you handle and secure your tools and materials is just as important. You have two main options: clamp the object and hold the tool, or clamp the tool and hold the object. For delicate work, clamping the tool - using a robust woodworking vise, for instance - gives you better control over the workpiece. Tools like belt sanders, finger sanders, and die grinders can be securely mounted this way, allowing you to focus on precision.
Your workspace setup also plays a big role in safety. A solid table or portable workbench ensures stability, and clamps or vises keep your workpiece from shifting. Good lighting helps you see clearly, while proper ventilation or dust collection reduces airborne particles. Make sure you have enough space to maneuver your tools safely without bumping into anything - or anyone.
Be aware of common hazards and how to prevent them. Flying debris is a constant risk, so always wear eye protection and maintain control of your tools. Loose clothing or hair can get caught in rotating parts, so wear fitted clothes and tie back long hair. Accidents from losing control of tools can be avoided by securing your workpiece properly, maintaining a firm grip, and never forcing a tool to work harder than it’s designed to. Fatigue is another factor - taking regular breaks can help you stay sharp and avoid mistakes.
When using powerful attachments like the Arbortech on an angle grinder, double-check that everything is securely fastened. These attachments need to be bolted on just like a standard blade, and you should always maintain a firm grip with both hands to keep control.
How to Maintain Your Power Carving Tools
Keeping your tools in top shape is just as important as using them safely. Proper maintenance ensures they perform well and last longer.
Investing in quality tools pays off in the long run. High-grade tools with durable cutting burrs and components not only work more reliably but also require less upkeep. For example, tungsten carbide cutters stay sharp longer and deliver consistent results compared to cheaper alternatives. While these might cost more upfront, they save you money on replacements and repairs over time.
Regular inspections and replacements are key. Check cutting burrs and blades frequently - dull tools not only perform poorly but can also be dangerous to use. For sanders, replace belts and pads as soon as they show wear to keep your work smooth and even.
Cleaning and proper storage go a long way. After each use, clean your tools thoroughly to remove dust and debris from vents and moving parts. Store them in a dry, well-lubricated space to prevent rust and ensure they’re ready for your next project.
Understanding your tool’s capabilities can also prevent unnecessary damage. For instance, budget rotary tools like the Dremel 4000 aren’t built for heavy, continuous use. Running them for more than 30 minutes at a time can cause them to overheat or burn out [3]. If your project demands extended carving sessions, it’s worth upgrading to a professional-grade tool like the Foredom rotary tool, which can handle longer use and ultimately saves you from frequent replacements [3].
Choose the right tool for the job. Use the Arbortech for rapid material removal, die grinders for intricate details, and Dremel tools for fine finishing touches. Always inspect your tools before starting to ensure they’re in good working condition - malfunctioning equipment can be dangerous and may ruin your project.
Toolstash: A Platform for Tool Management

If you're a wood carver, chances are you've built a collection of specialized power carving tools over the years. But keeping track of all those tools? That can get overwhelming fast. That’s where a tool management platform comes in handy - it simplifies the chaos and keeps your workshop running smoothly.
Toolstash (https://toolstash.com) is a free platform designed specifically to organize, track, and maintain your workshop inventory. It lets you digitally log every tool, using features like AI Snap to automatically identify and record tool details. This way, you always know what’s in your arsenal and when maintenance is due.
One of its standout features is smart categorization, which organizes tools by function. This makes it easy to grab the right tool for each stage of carving. For instance, roughing out might call for aggressive tools like Arbortech attachments, while fine carving requires rotary burrs in die grinders. Detail work? Micro burrs in Dremel tools. And for finishing touches, power sanders come into play. With Toolstash, finding the right tool is no longer a guessing game.
Another time-saver is the location tracking feature. Ever spent ages looking for a specific tool? Toolstash lets you record exactly where each item is stored, whether it’s a cutting burr, safety gear, or a specific grade of tungsten carbide cutter. Instead of rummaging through drawers and cabinets, you’ll know exactly where to find what you need - saving time and reducing frustration.
Beyond just organizing your tools, Toolstash helps you maintain them. Keeping detailed records ensures every accessory, from sanding belts to tungsten carbide cutters, is tracked with precision. You can log maintenance schedules, note compatibility between tools and accessories, and even record warranty details or modifications. For high-speed tools that operate at 20,000+ RPM, having these records at your fingertips is not just convenient - it’s essential for safety and performance.
If you share tools in a workshop or carving community, Toolstash simplifies the process with loan tracking. Clear records of who borrowed what and when ensure tools are returned on time, avoiding mix-ups or lost equipment.
Another handy feature? AI chat assistance. This tool offers personalized advice based on your actual inventory. Whether you need tips on maintaining tungsten carbide cutters, guidance on using die grinders, or help choosing the best tool for a specific task, the AI is there to assist.
For consumable supplies like sanding belts, rotary burrs, or abrasive buffs, Toolstash’s inventory system helps you monitor stock levels and set reorder reminders. Running out of a crucial cutting burr mid-project? That’s a problem you won’t have to deal with anymore.
And don’t worry about your data - Toolstash offers secure storage to keep all your inventory details private. From maintenance schedules to project notes, your information stays protected and accessible only to you.
With reminders for routine upkeep and repair tracking, Toolstash helps prevent unexpected tool failures and extends the lifespan of your equipment. For carvers managing multiple projects and specialized tools, this platform transforms workshop organization into a seamless process. Instead of wasting time searching for tools, you’ll have more time to focus on what matters most - your craft.
Conclusion
Power carving opens up endless possibilities, blending quick material removal with fine detailing to inspire both beginners and seasoned artisans.
You don’t need a hefty budget to get started. A Dremel 4000 with a flex shaft is an excellent tool for beginners, offering everything you need to dive into the craft. As you gain confidence and tackle more challenging projects, upgrading to advanced tools like the Foredom K.5240 Woodcarving Kit or incorporating Arbortech attachments for faster wood removal can elevate your work to the next level.
While power carving comes with a learning curve and requires strict safety measures, it's far from overwhelming. Understanding your tools, maintaining them properly, and practicing regularly will significantly enhance the quality of your projects. With power tools, you can carve into wood grain with ease, shape materials quickly, and achieve consistent results - tasks that are far more time-consuming with traditional hand tools. However, precision is key; overworking the material or rushing can lead to mistakes, so technique matters as much as the tools themselves.
As your tool collection expands, keeping everything organized and in good condition becomes essential. A simple tool management system can save time and help you stay focused on your craft, allowing you to work more efficiently and creatively.
The beauty of power carving is how approachable it is. You don’t need years of experience to create something amazing - just a willingness to learn, a commitment to safety, and patience as you refine your skills. Every expert started as a beginner, and today’s tools make it easier than ever to see progress quickly. Whether you’re crafting decorative accents, functional pieces, or expressive sculptures, power carving offers the speed and control to turn your ideas into reality.
FAQs
How can I properly maintain power carving tools to keep them working efficiently and lasting longer?
To make sure your power carving tools stay in great shape and serve you well for a long time, here are some simple but essential maintenance tips:
- Keep them clean: Dust, debris, and resin buildup can affect performance. Use a soft brush or compressed air to clean out those hard-to-reach spots.
- Sharpen blades and bits regularly: Dull edges don’t just make cutting harder - they can also overwork the motor. Sharpen as needed to keep everything running smoothly.
- Lubricate moving parts: A little oil or grease goes a long way in reducing wear and tear on your tools.
- Check cords and connections: Damaged or frayed cords can be dangerous. Inspect them often and replace any that show signs of wear.
- Store them right: A clean, dry place is best to protect your tools from moisture and dust.
Taking these steps will help your tools perform better and last much longer.
What should I consider when choosing the right power carving tool for my wood carving projects?
When choosing a power carving tool, it's essential to match the tool to both the type of wood you're working with and the specifics of your project. For example, softer woods like pine or basswood are much easier to carve and pair well with tools such as rotary carvers or power chisels. On the other hand, harder woods like oak or walnut demand sturdier tools with higher power to handle the job effectively.
The level of detail in your project also plays a big role. If you're working on intricate designs, opt for tools equipped with smaller, more precise attachments. For larger-scale projects or rough shaping tasks, angle grinders or die grinders with carving discs can get the job done more efficiently. Above all, choose tools that feel comfortable in your hands and align with your skill level - this not only improves control but also enhances safety.
What safety tips should I follow when using power tools for wood carving?
Safety should always be a top priority when using power tools for wood carving. Here are some key precautions to help you stay safe:
- Wear proper protective gear, such as safety goggles to guard your eyes from flying debris, a dust mask to avoid inhaling fine particles, and gloves to protect your hands.
- Keep your workspace secure and organized. Ensure all tools are in good working condition, clamp your workpiece firmly, and make sure the area is well-lit and free from clutter.
- Stick to the manufacturer’s instructions for every tool you use. This includes proper handling, maintenance, and adhering to recommended settings.
- Avoid wearing loose clothing or accessories like jewelry, which could get caught in moving parts and cause injury.
- Always unplug tools before changing accessories such as blades or bits. This simple step can prevent accidental starts.
Taking these measures will help you carve wood with confidence while minimizing risks.